
Hi friends !!
Preeti Datta (aka Dutt Preety) here. How are you today? Hope you are having a great & blessed festival season. Here is wishing you and yours the very best from all of us at the Bob n Betty family 🙂
Today, I’ll be sharing 3 Mixed Media Tags. Bob N Betty’s Premium Textured Chipboard 1200 gsm was used for making these large sized tags. 1 sheet was cut into 3 rectangles of 9.5 by 4.5 inches. The chipboard is sturdy, textured on one side and white in color so it is a good option for mixed media work as it can withstand multiple media being applied to it without buckling.
The idea behind these tags was to show one way to use snippets of patterned paper & faux leather we inevitably collect as paper crafters. These are little bits and pieces left behind from larger projects and because they are from our much loved and pretty packs, it is difficult to throw them away. So incorporating these into tags for layers and added texture is one way of using these up. Die cutting them for making little embellishments is another way. Let’s get started.
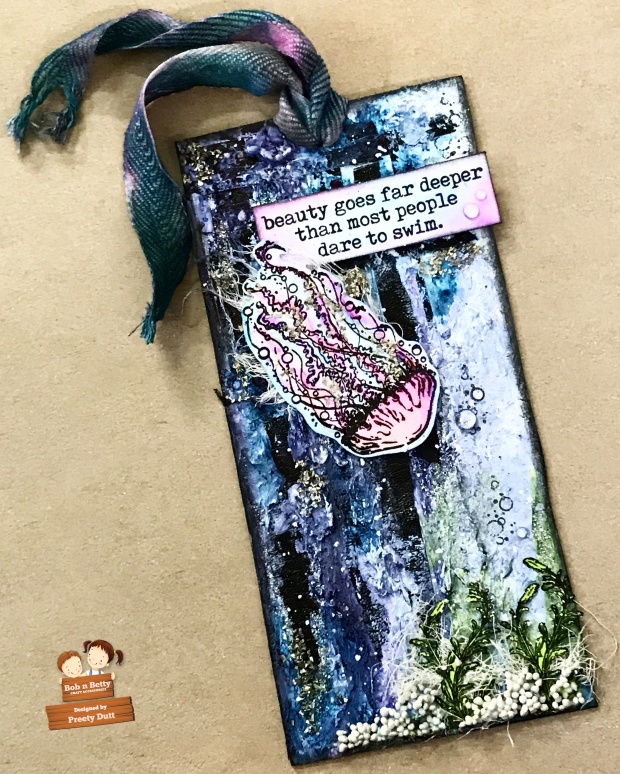
TAG 1: Sea Themed
Slideshow: These are some close-up photos of the tag
Process:
Slideshow: Photo Tutorial
- Strips of faux leather were adhered to the tag and then for added texture and priming the surface, white gesso was applied. The lumps that are formed around the gesso bottle were also applied to the tag using a palette knife to add to the texture and bumpy look.
- Color was added using pigment powders and movement was created with sprays of water.
- Glass Glitter was added at some places with matte gel. Some glitter glue was also applied for a sparkly look.
- Few sea related images and a sentiment were stamped and colored with zig markers and then fussy cut
- The images were attached to the tag with matte gel. Art stones and gauze were adhered for added texture.
- Glossy accents was applied on top of the image, few dew drops were added and some white splatter was created.
- In the end, some of the raised areas of the tag were dry brushed with white gesso to bring out the texture and the tag was distressed with black soot distress ink around the edges for a finished look.
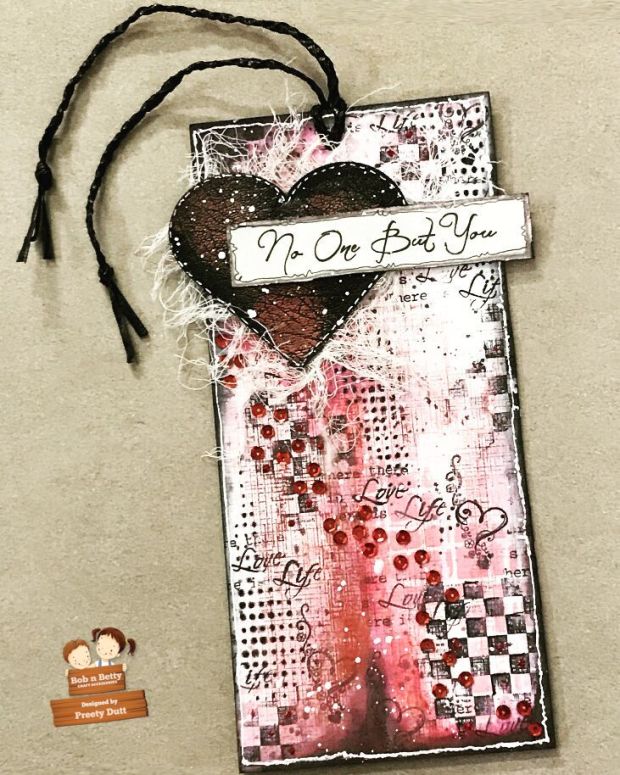
TAG 2: LOVE THEMED
These are some close-up photos of the tag


Process:
Slideshow: Photo Tutorial
1. Lava Red Inka Gold was applied with one’s finger, to some of the areas of the tag to bring out the natural texture on the surface
2. Some images were stamped onto the tag in random places using black archival ink (as it is a permanent ink and won’t run when watercoloring is done later on)
3. Color was added to the tag using zig markers and it was sprayed with water to get an organic look
4. Stenciling was done with a couple of stencils and archival ink using a blending tool and foam
5. A heart was die cut from faux leather and the texture in it was highlighted with red inka gold. This was adhered to the tag with some gauze underneath.
6. A fussy cut sentiment from the Bob n Betty “No One But You” Paper Pack was adhered to the heart.
7. Some doodling was done using a black marker and a few details were added with white acrylic paint.
8. Red stickles and sequins were attached to the tag for added sparkle. Also, white splatter was created to bring the piece together.
9. In the end, a braid was created with thin strips of faux leather and this was added to the tag.
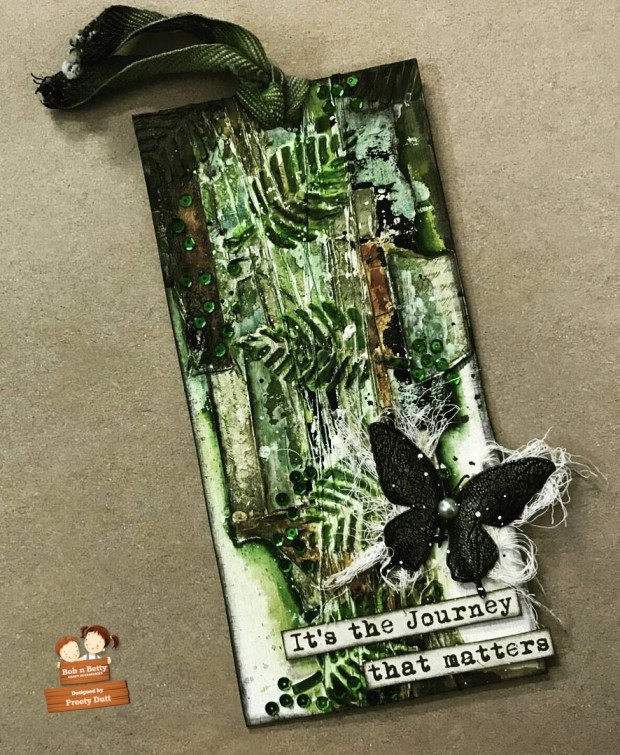
TAG 3: BUTTERFLY
These are some close-up photos of the tag:


Process:
Slideshow: Photo Tutorial
- Snippets of patterned paper from the Bob n Betty “Amor Mio” Paper Pack and strips of faux leather were adhered to the tag using matte gel
- Thread was wrapped around the tag and then some white gesso was applied with a palette knife
- Modelling paste was applied to the tag through a leaf stencil
- Color was added using ink sprays and movement was created with sprays of water
- The title was fussy cut from the Bob n Betty “No One But You” paper pack and the butterfly embellishment was created by die cutting a snippet of faux leather and then applying some mint green inka gold on it to bring out the texture.
- In the end, the edges were darkened to bring definition and some white splatter was added.
That is all for today.
Please do share your gorgeous creations using Bob n Betty papers with us on our facebook group Bob n Betty Buddies.
Remember you can always purchase all the beautiful Bob n Betty products from our wonderful Sale Buddies.
Thanks for your precious time 🙂
Stay Blessed!

O wow amazing tags superb gorgeous loved them all preeti 👌👌
LikeLiked by 1 person
Thanks a lot 🙂
LikeLike