MIXED MEDIA CARDS BY RUCHI’S CRAFETERIA FEAT.CAFFE ROMANZA PAPER COLLECTION

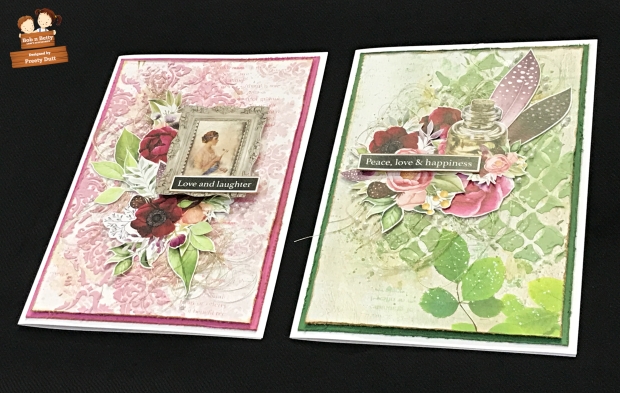
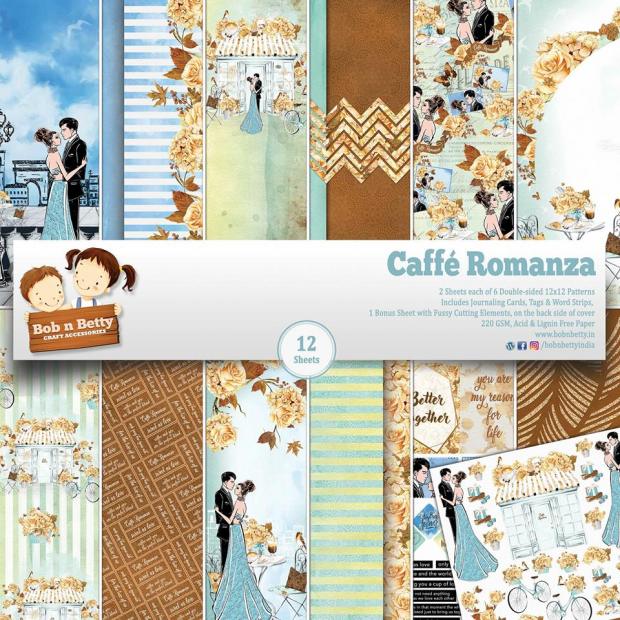
Hey there! Ruchi here from Ruchi’s Crafeteria and today I’m sharing a set of Mixed Media Cards using ‘Caffe Romanza’ paper collection.

ODOP3080

OAJS2649


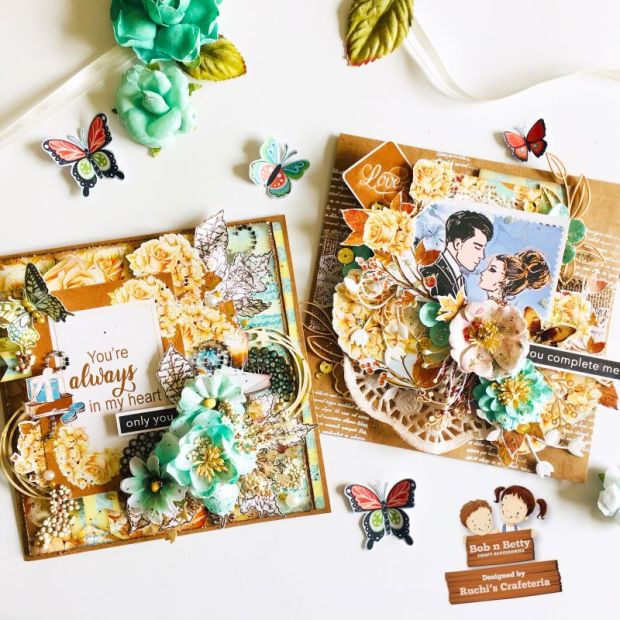
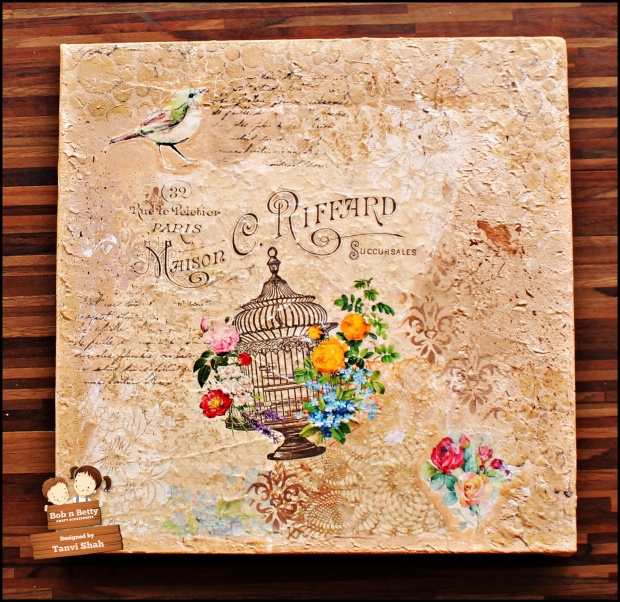
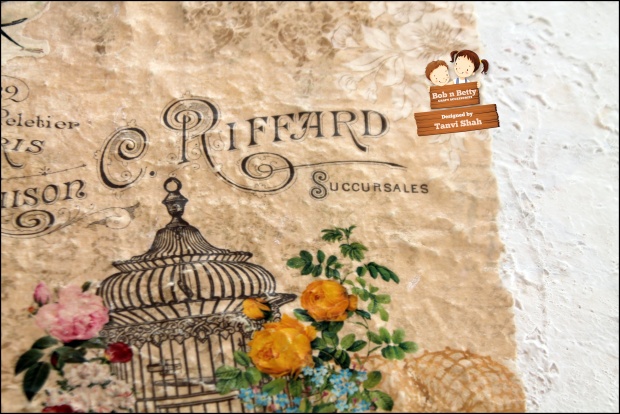
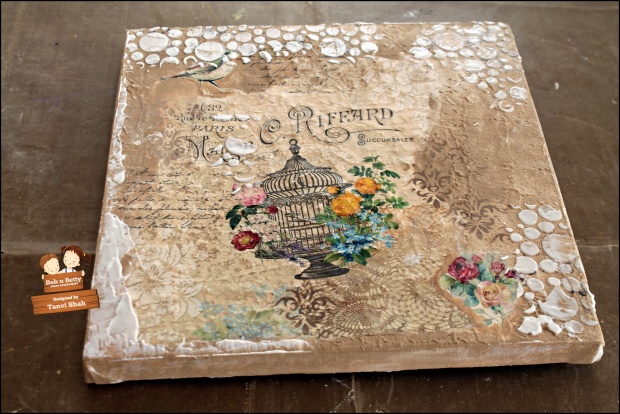
I’ve created these cards with mixed media technique and gave them vintage look. Mix and match these beautiful Caffe Romanza pattern papers and fussy cut lots of elements from the element sheets which comes with the paper pack.

RATE5457

PDKC5938

CEHW2118


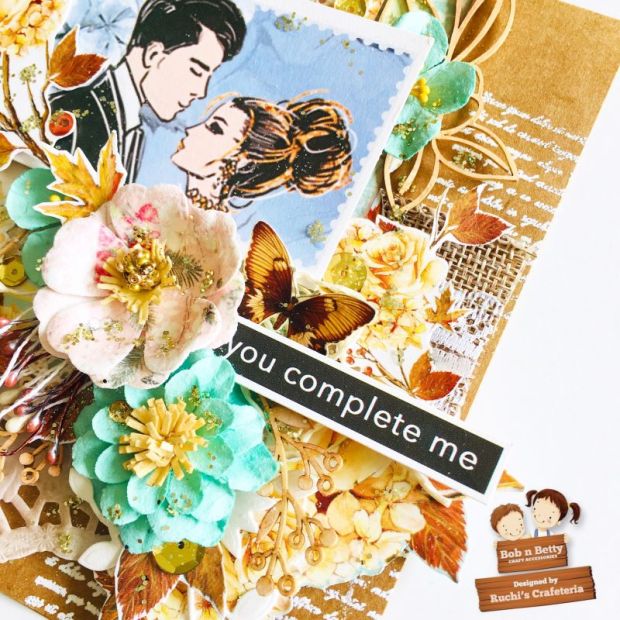
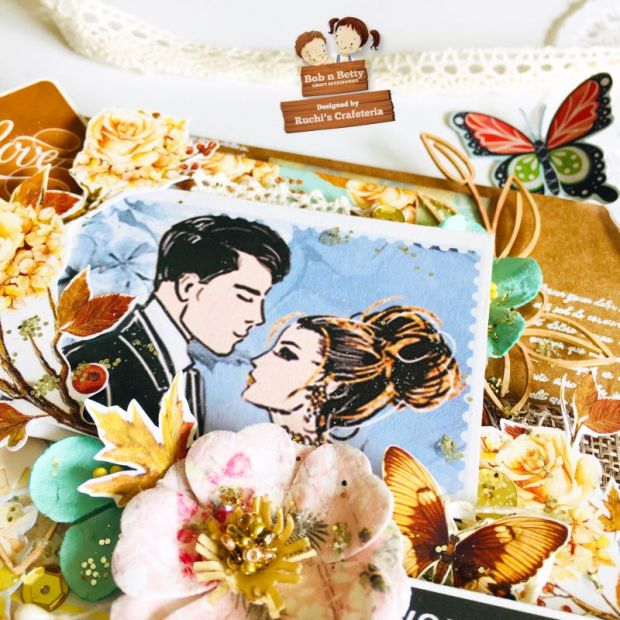
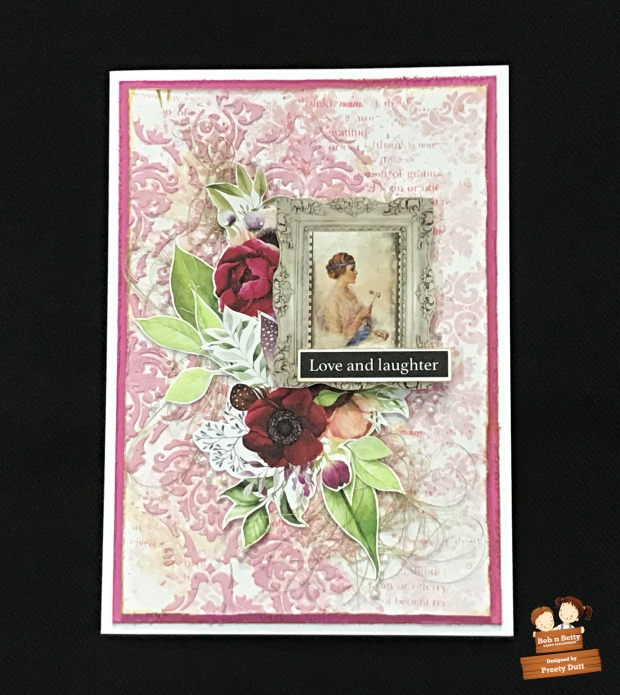
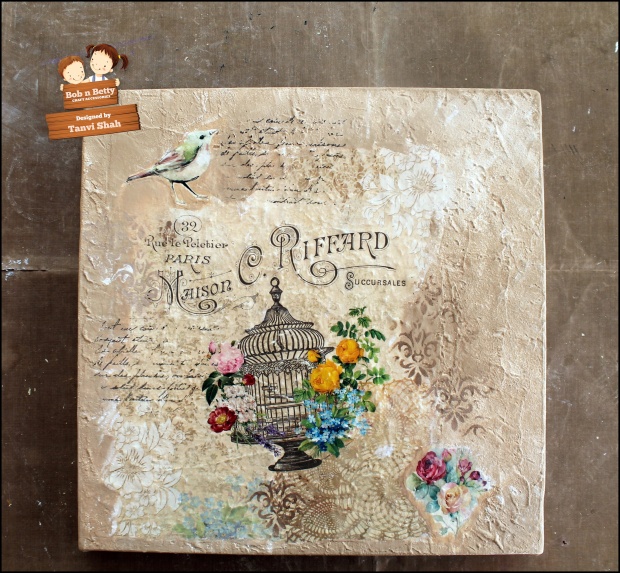
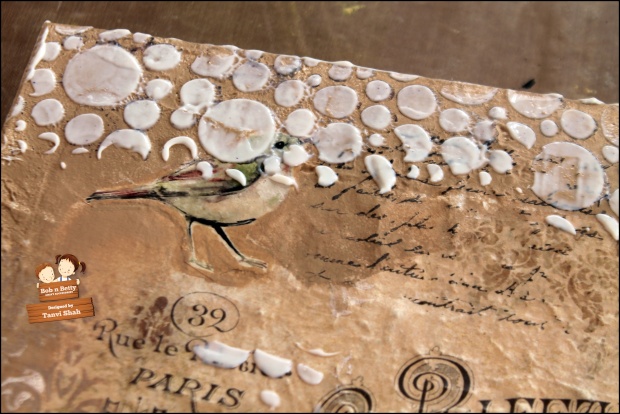
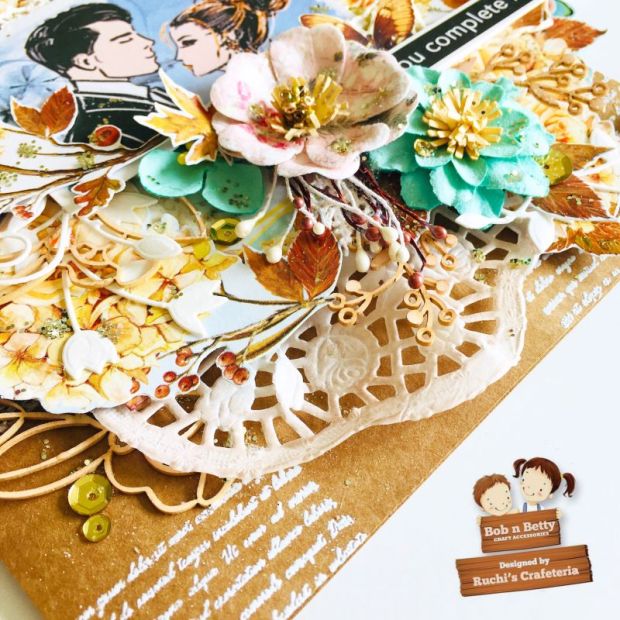
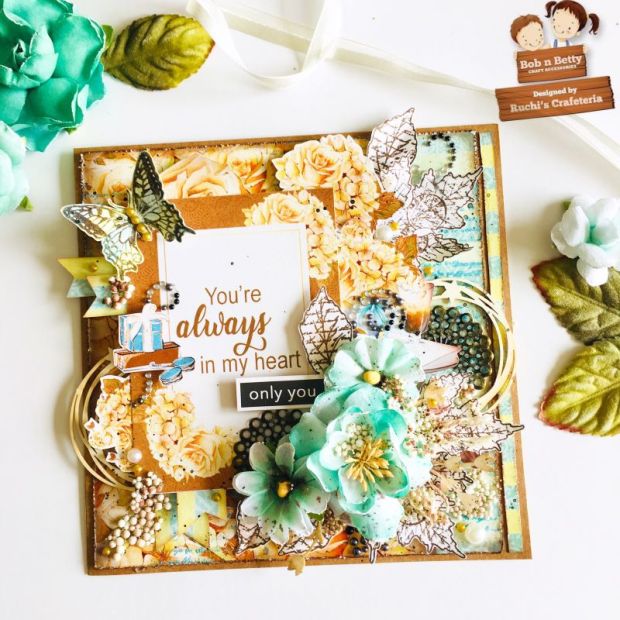
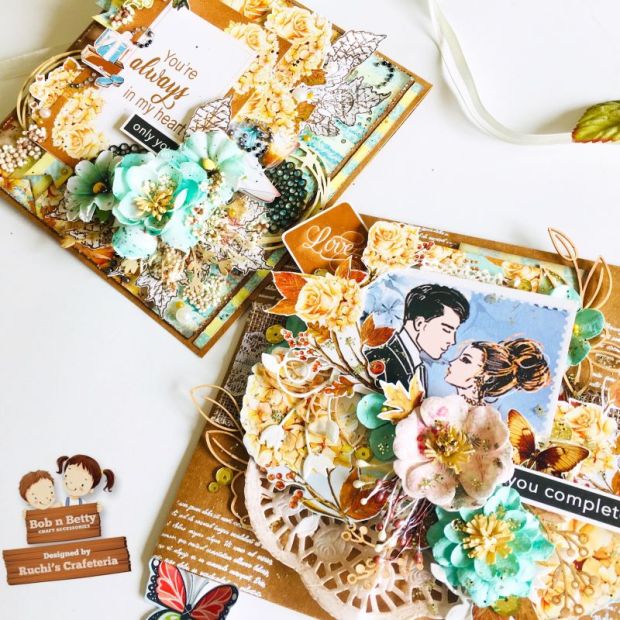
These cards are 6″x6″ in size and chose kraft cardstock for card base. Stamped and heat embossed in white some script using Crafter’s Companion- Vintage Chic stamp set.

EPGZ9381

NOTU2040


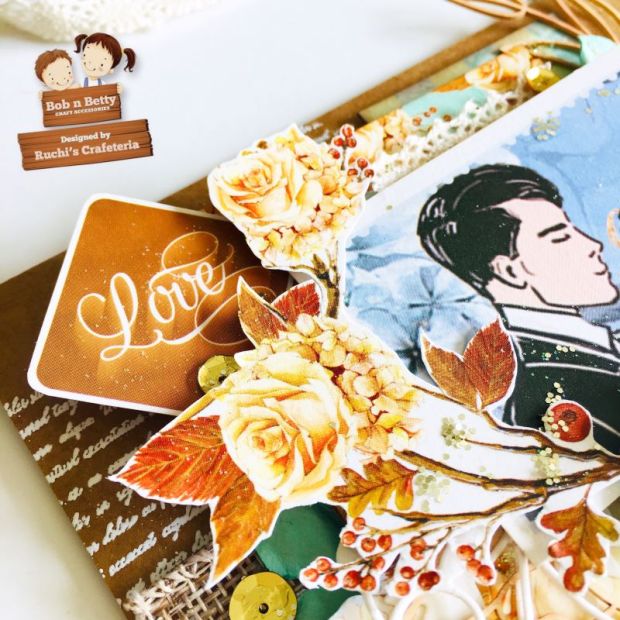
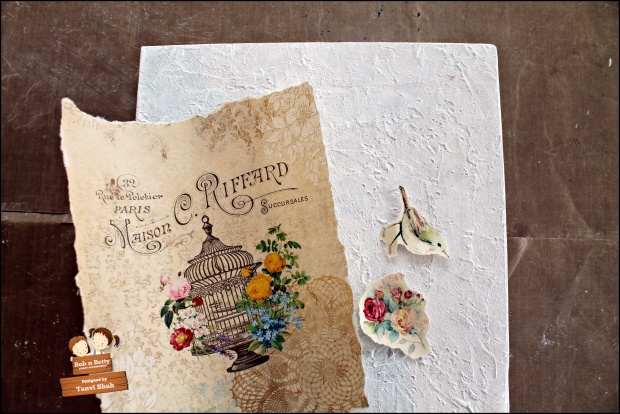
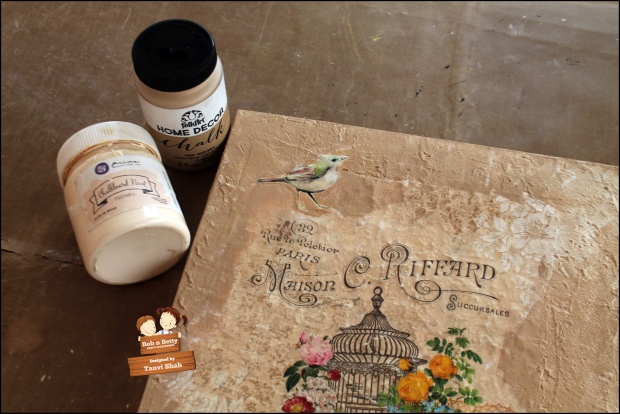
Fussy cut some flowers, tags, sentiments which came along with the pack. Arranged and layered them on my card panel along with Prima flowers, burlap lace, Mudra chipboards ans sequins, pollen, die cuts, Expressions Craft- Alaska Gold glitters.

XFYA2312

PWWV3517


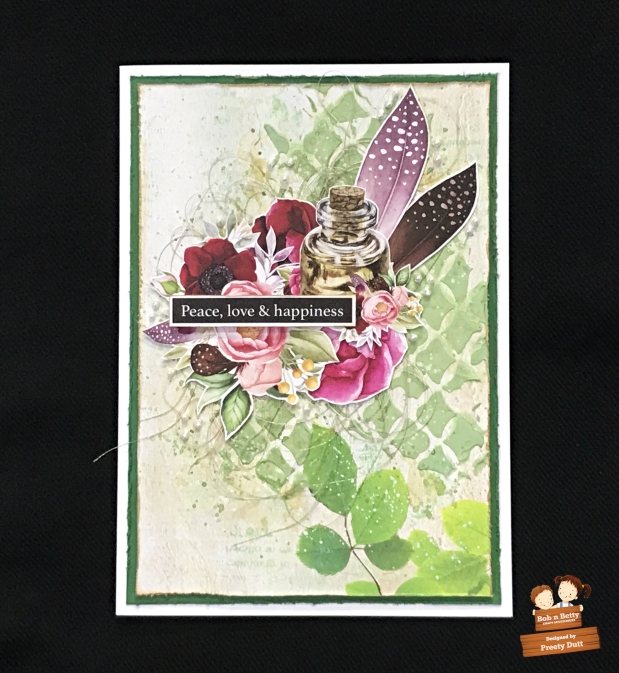
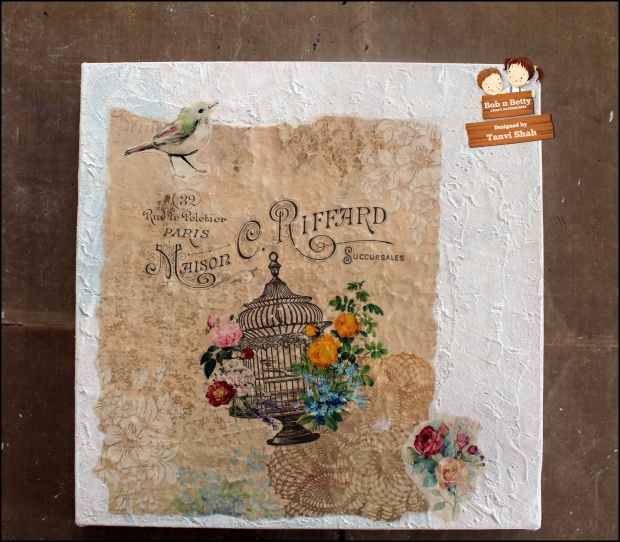
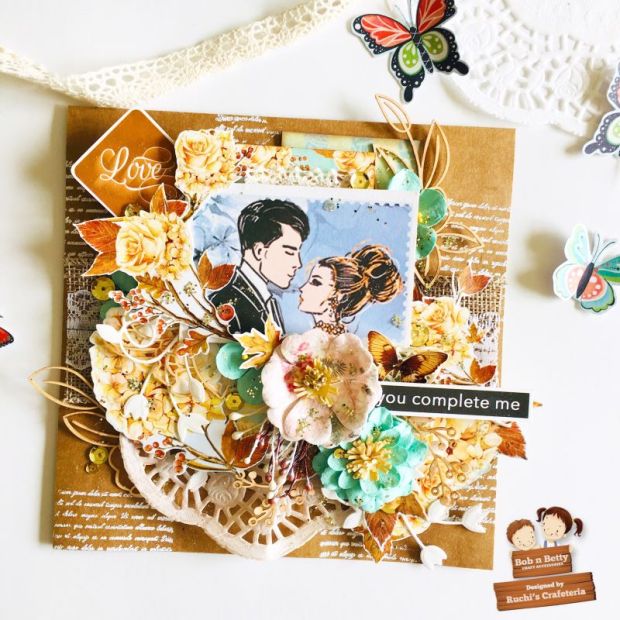
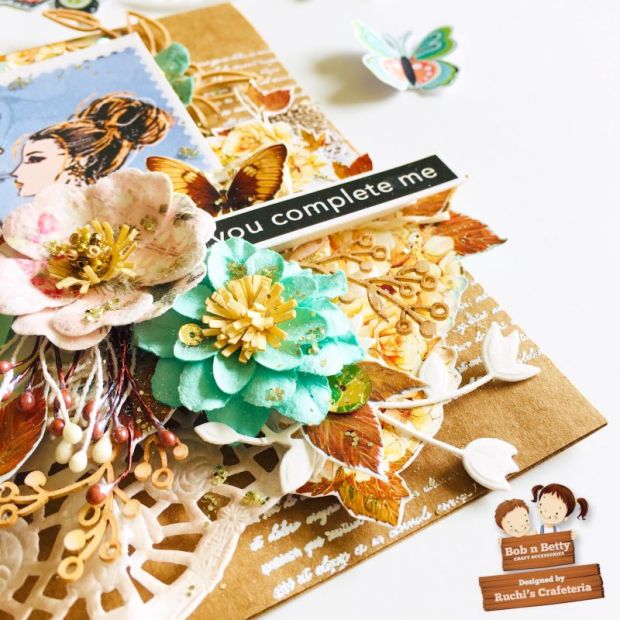
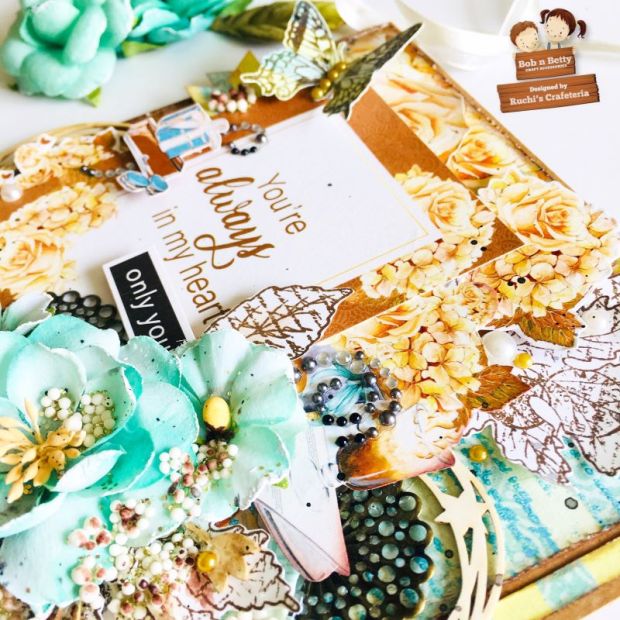
For my another card, I’ve cut another paper from the pack and distressed the edges using Tim Holtz edge distressing tool and applied Walnut Stain distress ink.

HFKT1382

WPZI3031


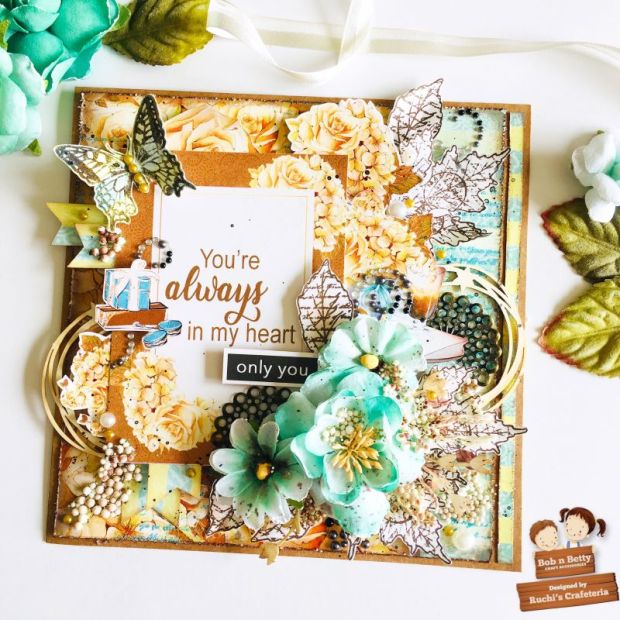
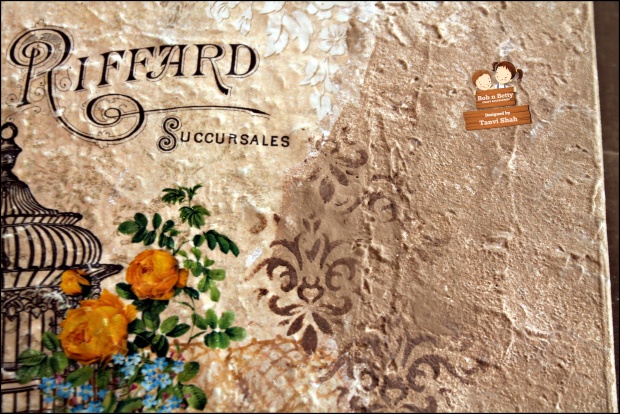
This time I’ve stamped the script using Broken China-Distress Oxide and heat embossed in clear.

RYDT7591

OZND8458


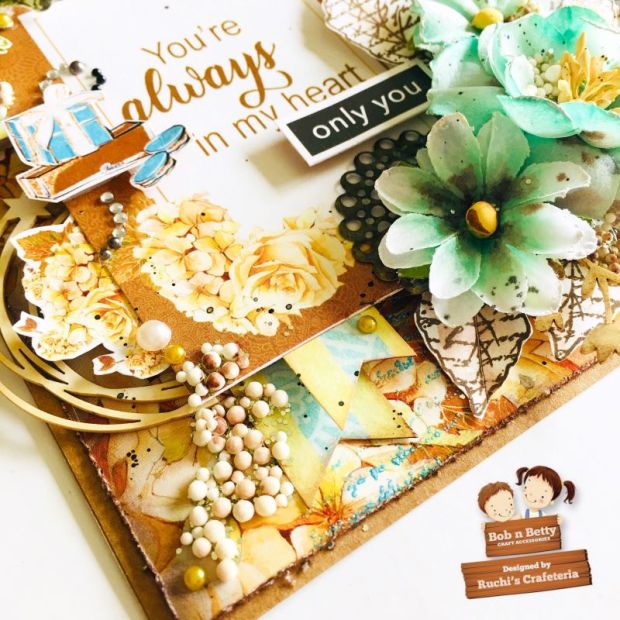
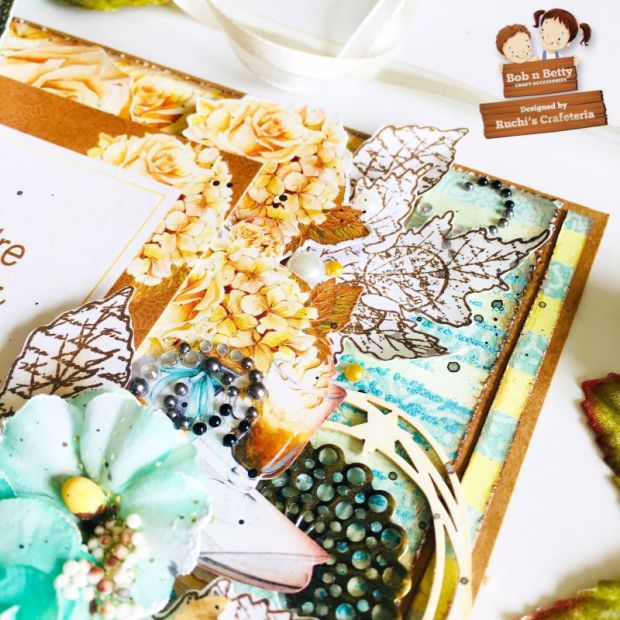
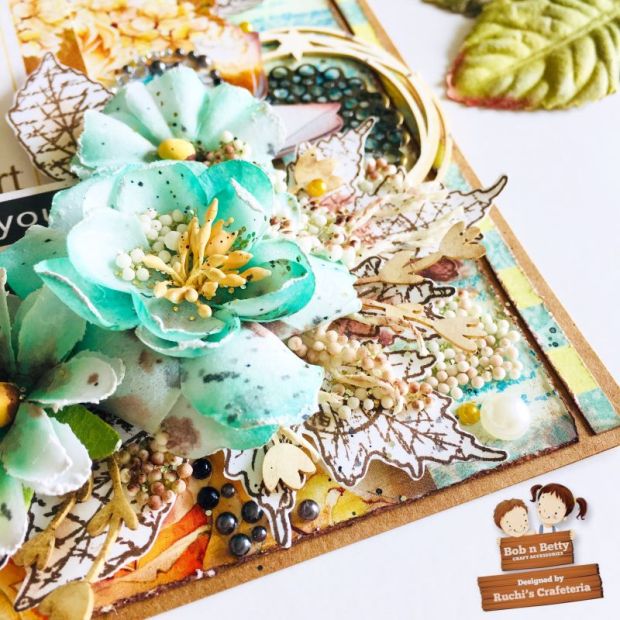
Stamped some vintage fall leaves using same Walnut Stain distress ink and fussy cut them. Again used some Prima flowers, Mudra chipboards, Expressions Craft Alaska Gold glitter and Deco Stones, some half pearls and metal charms.

GWFF1428


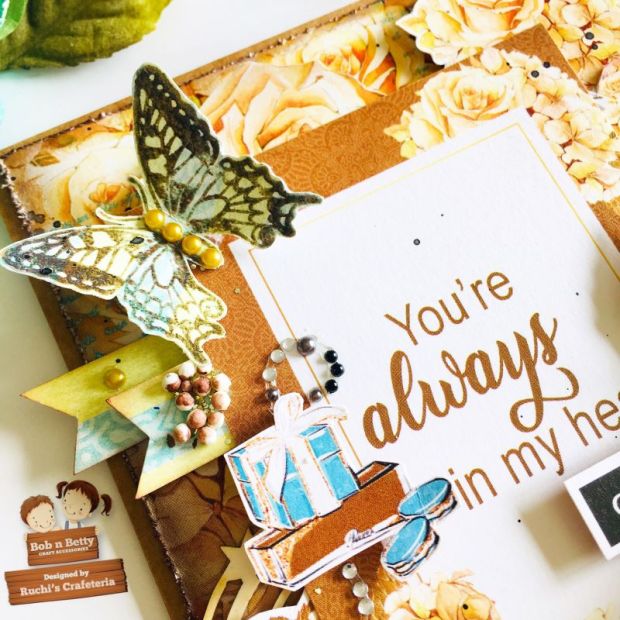
I’ve stamped this butterfly on one of Caffe Romanza paper using Walnut Stain distress ink and Crafter’s Companion stamp, and heat embossed in clear. Really liking the out came 🙂

GRDS1433


KRHD0882

SDVW7687

XATD3627

You can find one more project of mine using Bob n Betty Caffe Romanza paper pack HERE

Product used

49741294_2213353992248330_1121589073937432576_n

I hope you like my today’s project. See ya next time.

Love, Ruchi

Ruchi


Mixed Media Layout by Tanya Cloete, feat. Roseate Paper Collection

Hello dear Bob n Betty friends.
Today I’m sharing a Mixed Media Layout featuring the gorgeous Roseate Collection. I have incorporated the matching decoupage papers into the layering. These decoupage papers are so pretty and so versatile.
Here are the instructions you may use to recreate such a project
1. Add some colour to the background on one of the sheets in the Roseate Collection using some white gesso and Impasto paints.
2. Add texture randomly using a stencil and white crackle texture paste.
3. Add paint splatters randomly over the page.
4. Cut a few die cut shapes from the collection sheets and decoupage papers to form the layering of the composition.
5. Emboss the chipboard pieces with embossing powders.
6. Fussy cut a few elements from the collection sheets.
7. Arrange the rest of the embellishments as per the picture or as you like.
8. Add some buttons and sequins for the finishing touch.
9. All done!
Thanks!
Kind Regards/Vriendelike Groete,
Tanya

Mixed Media Cards Designed by Preeti Datta, Feat. Roseate Paper Collection

Hi folks!
Good Morning 🙂
Preeti Datta (aka Dutt Preety) here. How are you doing ?

Today, I’d like to share Two Mixed Media Cards designed using the new & absolutely gorgeous Roseate Paper Collection.

Mixed Media Cards

pair 3

pair 5

Card 1: Love & Laughter

card 1card 1 close up 1

card 1 close up 2

card 1 close up 3

card 1 close up 4

card 1.3

Card 2: Peace, Love & Happiness

card 2.1card 2 close up 1

card 2 close up 2

card 2 close up 3

card 2 close up 4

card 2.5

Pictorial:

  1. Cut 2 pattern papers from the Roseate Paper Collection into 4.5 by 6.5 inches in size & then distress their edges with a paper distresser, darken the edges with ink to better define the edges & apply clear gesso on these panels

1

2. Mix modelling paste with pigment powders and then apply the coloured pastes through stencils onto the prepared panels using a palette knife2

3. To add interest to the background, stamp using matching ink colors and also add some more color (and splatters) to the background using the same pigment powders & distress ink3

4. Fussy cut some of the beautiful images from the Roseate Paper Collection, these will be our embellishments4

5. Finally, gather some more elements like thread, lace, pearls, gauze, resin frames etc that may be needed while layering. For these cards, I decided to go simple & use only the fussy cut elements and some golden thread, adding some of the elements with 3d foam tape for added dimension. In the end, added some black and white ink splatter & perfect pearls. 5

Bob n Betty Supplies Used:

Roseate Paper Collection

37373321_2098780387039025_7121200654604828672_n

That is all for today.

Please do share your gorgeous creations using Bob n Betty papers with us on our facebook group Bob n Betty Buddies. 

Remember you can always purchase all the beautiful Bob n Betty products from our wonderful Sales Buddies. 

Thanks for your precious time
Stay Blessed!
Preeti D.
preeti-dutt1

Cute Baby Mixed Media Card Designed by Preeti Datta

Hi folks!
Good Morning 🙂
Preeti Datta (aka Dutt Preety) here. How are you doing ?

Today, I’d like to share a Cute Baby Mixed Media Card. This is a big sized card great for gifting. I’ve used the beautiful and totally adorable papers from Bob n Betty’s earlier collections, “Cuddling Cuties” and “Baby Bliss“. All of Bob n Betty’s paper collections have been brilliantly designed, so, it is very easy to mix and match papers from different collections, go back to the earlier releases and mix them with new ones. Sky is the limit with respect to matching elements and coming up with new combos 🙂

 Cute Baby Mixed Media Card:

Pic 1

Here are some close-up photos:

close up 1

close up 4

close up 5

close up 2

close up 6

close up 8

close up 9

close up 10

close up 11

close up 12

close up 7

PROCESS:

  1. Prepared the 5 by 11.5 inch white card base with thick 300 gsm white card stock
  2. Cut the main panel and mats, used pastel coloured card stock to create the mats. Distressed & inked the edges for a textured and defined look.  Adhered the panels  together, used 3d foam tape between the layers for dimension
  3. On the main panel, did background stencilling by mixing light paste with a blue Pigment Powder and then applied it through dots and number design stencils
  4. Fussy cut elements from Bob n Betty’s Cuddling Cuties and Baby Bliss Paper Collections and also, die cut the word baby and a few shapes with these pattern papers
  5. Gathered all the supplies for layering including thread, gauze, fussy cut images, lace and die cuts. Then created a visually pleasing composition and adhered the elements. Used 3d foam tape to attach some elements.
  6. Created ink splatter and added Nuvo drops as a finishing touch.

Bob n Betty Supplies Used:

Baby Bliss Paper Collection

Baby-Bliss-1140x659

Cuddling Cuties Paper Collection

Cuddling-Cuties-1140x659

That is all for today.

Please do share your gorgeous creations using Bob n Betty papers with us on our facebook group Bob n Betty Buddies. 

Remember you can always purchase all the beautiful Bob n Betty products from our wonderful Sales Buddies. 

Thanks for your precious time
Stay Blessed!
Preeti D
preeti-dutt1

“Beauty in Nature” A mixed media canvas by Riddhi Jani, featuring Meadows paper collection

Heya everyone,

Riddhi here, and I’m sharing my new canvas made for Bob n Betty, using the latest Decoupage Specialty release “Meadows”. I’m absolutely in love with the vintage beauty of this gorgeous collection.

I have used 8×10 inches canvas here as the base and sealed the paper with gel medium. Some paint splashes here and there and a cluster of flowers to give it a more realistic look.

Over to the project now…..

I hope you like it

thanks
Riddhi

Grungy Vintage Cards Designed by Preeti Datta Featuring Classics Decoupage Specialty Papers

Hi friends 🙂

Preeti Datta (aka Dutt Preety) here. How are you doing?

Today, I’d like to share A Set of Two Grungy Vintage Cards. I’ve used papers from the new and gorgeous “Classics” Decoupage Specialty Papers Collection. They are so versatile and the prints are full of vintage goodness. A must have in your stash! The prints in this collection make for brilliant focal images as well as classy backgrounds. I went for a grimy, grungy, stained look this time around.

Grungy Vintage Cards

IMG_20180613_113006_452

Card 1: Finders Keepers

card 1.2

card 1 close up 1

card 1 close up 6

card 1 close up 3

card 1 close up 4

card 1 close up 5

card 1 close up 2

Card 2: Shine Brightly 

card 2.2

card 2 close up 1

card 2 close up 3

card 2 close up 4

card 2 close up 5

card 2 close up 6

card 2 close up 2

Process:

  1. Cut one of the papers from the Classics Collection of Decoupage Specialty Papers, distressed the edges, darkened them with Vintage Photo distress ink and created mats for these panels
  2. Did background stamping with archival inks and background stenciling with heavy white gesso (any type of texture paste will do)
  3. Created a grungy look by adding color with sprays and created drips and splatter
  4. For the focal elements, used Tim Holtz Paper dolls. Layered washi tape, thread, gauze, chipboards and gems and added some blue color as well. For the sentiments, used Tim Holtz metallic stickers
  5. Adhered the panels to the mats and mounted these on the large sized card bases. To create dimension between the paper layers, used 3d foam tape

Used Bob n Betty’s Classics Decoupage Specialty Papers:

Classics

That is all for today.

Please do share your gorgeous creations using Bob n Betty papers with us on our facebook group Bob n Betty Buddies. 

Remember you can always purchase all the beautiful Bob n Betty products from our wonderful Sales Buddies. 

Thanks for your precious time
Stay Blessed!
Preeti D
preeti-dutt1

Mixed Media Layout “Memories” Designed by Preeti Datta Featuring Little Wonderland Collection

Hi friends 🙂

Preeti Datta (aka Dutt Preety) here. Hope you are doing well.

Today, I’d like to share a Mixed Media Layout titled “Memories”.  I was inspired by the cute child’s photo who reminded me of my own niece when she was little. I’ve used papers from the totally adorable “Little Wonderland” Scrapbook Papers Collection. This paper pack is perfect for all children’s themed projects including cards, scrapbooks, canvases, party decorations like banners, gift boxes etc My wonderfully talented team mates and I have shared lots of projects in the past few months using these papers, so I highly recommend you to check those & try out some of the designs & techniques shared 🙂

Mixed Media Layout- Memories

3

Here are some close-up photos:

close up 1

close up 2

close up 3

close up 4

close up 5

close up 6

close up 7

close up 8

Process:

  1. One of the papers from the Little Wonderland Collection was taken as the base. It was torn a little from all 4 sides, distressed and darkened with grey ink. Then this was adhered to a 12 by 12 size sheet of heavy white card stock. Stitch stamping was done in the gaps created to give a textured look and add interest to the page.
  2. Clear gesso was applied on the scrapbook paper to prep it for mixed media work. Then light paste was added through a stencil in different areas of the page, to prepare the background and add texture.
  3. To add color to the page, light colors (blue and yellow) of Ink sprays were added, movement was created with drips.
  4. Background stamping was done with grey archival inks.
  5. Photo mats and frames were created with die cuts of papers from the Little Wonderland Collection and white card stock.
  6. Few elements were fussy cut from the Little Wonderland Collection
  7. All the elements for layering were gathered and adhered to the page in a visually pleasing composition. Elements included fussy cut images, sentiments, twines, thread & flowers. To add dimension, some of the elements were adhered with 3d foam tape.
  8. The project was embellished with few buttons & to add additional texture and shine, a mixture of mini & regular art stones, silver sequins & soft matte gel was applied to various places on the page.
  9. In the end, some heavy white gesso was applied to the elements using the dry brushing technique and a few ink splatters were created.

Used Bob n Betty’s Little Wonderland Scrapbook Papers Collection:

Little-Wonderland-1140x659

That is all for today.

Please do share your gorgeous creations using Bob n Betty papers with us on our facebook group Bob n Betty Buddies. 

Remember you can always purchase all the beautiful Bob n Betty products from our wonderful Sales Buddies. 

Thanks for your precious time
Stay Blessed!
Preeti D
preeti-dutt1

Mixed Media Layout by Niharika Gupta, feat. Decoupage Specialty Papers

Hi dear crafty friends,

I am not a decoupage artist but every time Bob n Betty comes up with a new release in Decoupage specialty papers, my heart skips a beat with the beautiful gorgeous designs. I cannot resist using them in scrapbooks or layouts. And so here I am with a new post, a layout on canvas using a sheet from the new Meadows collection.

I loved the flowers on this paper, and the butterflies are so magical. The moment I saw this design, this photograph was the first thing I thought of. This is one of my favorite pictures from our beach outings and I am so happy with the output.
The decoupage specialty papers are neither too thin, nor too thick and hence they are suitable for all types of projects. I just fussy cut the flowers and butterflies and layered them with minimal embellishments for this layout.
over to the pictures…

I hope you like it and find it inspiring. I am preparing for my summer break now and I hope you all have a crafty summer too.

Love & Hugs, Niharika.

A mixed media scrapbook by Riddhi Jani, feat. “You n I”

Hello guys,

I’m back with a new project to share with you all, This time I made a mixed media Scrapbook “Open the door of your heart” using truly gorgeous paper pack You n I by Bob n Betty. I personally endorse these papers, as they are perfect for all your love theme projects. And the floral patterns in this pack make it even more versatile for other projects too.

This scrapbook measures 10x10x3 inches and has 5 pages with many flips and folds. It can store up to 60-70 photographs and lots of messages.
Over to the pictures now…enjoyyy

Hope you all liked it 🙂

Love
Riddhi

Decoupage Mixed Media Canvas by Tanvi featuring Decopatch papers

Hello Friends!

This is Tanvi here! I am loving the new range of decopatch papers – very high quality 50gsm papers, a dream for all decoupage artists. You can check my previous posts with this awesome release here & here.

These papers are very thin & blend easily into the background to give a seamless finish, they truly do! Check the canvas I share today –

Ma18038

Stay with me as I take you through the steps to combine decoupage & mixed media to create unique wall decor for your homes.

The USP of these papers is the ease with which you can use them on surfaces, just like rice papers & tissues. To highlight this I started by creating a textured base for the 12×12 canvas.

Ma18018

Next I fussy cut a section (OLD WORLD CHARM sheet) & also some elements from the FLORAL ADORNMENTS sheet.

I decided on the layout & decoupaged them on the textured canvas.

Ma18019

Here is a close up to show how easily it blends on the textured background.

Ma18020

Next I colored the canvas with coordinating chalk paints.

Ma18021Ma18022

Some random stencilling & stamping over the textures –

Ma18023Ma18024


To add some more textures I stenciled clear crackle paste on the edges & added some paste with the palette knife too.

Ma18026Ma18027

To finish the canvas I splattered acrylic paint.  The Crackle paste dries clear over the textures to reveal the background through. the cracks, perfect for the image I selected! Spray with acrylic varnish to seal the canvas.

Ma18037

You can grab these papers from any of our Sales Buddies   &  share your gorgeous creations using Bob n Betty papers with us on our facebook group Bob n Betty Buddies. 

Thank you for visiting & happy crafting!