Vintage Cards Designed By Preeti Datta Featuring Meadows & Classics Decoupage Specialty Papers

Hi friends 🙂

Preeti Datta (aka Dutt Preety) here. How are you today?

There are only a few days left in the month of April and Bob n Betty will soon be celebrating it’s 3rd Birthday on 28th April, yay!! That’s tomorrow!! Everyone at the Bob n Betty family is very thankful to all it’s patrons & supporters. To celebrate, there is an awesome giveaway & a Mega Contest, to check out all the details & for your chance to win superb prizes, please visit the Bob n Betty Facebook page. Don’t miss this awesome opportunity, there is very little time left to participate 🙂

Today, I’d like to share a set of 2 Layered Vintage Cards I made using Bob n Betty’s beautiful new range of Decoupage Specialty Papers- “Meadows” and “Classics”. I also included a few elements from the “Glam Craft” collection. Both the cards are big sized, 5 by 9 inches. When I saw the pretty butterflies, birds and flowers, I was inspired by the theme of nature, so I added the title “Wild & Free” using alphabet beads, to both the cards.

The new Decoupage Specialty Paper Collections are perfect for vintage themed projects and they coordinate brilliantly with all the previous releases. It is super fun & easy to mix and match elements. The designs are gorgeous and these decoupage papers can be used for all kinds of paper crafting projects including decoupage, cards, scrapbooks, canvases, tags, art journalling etc. I would highly recommend checking out the numerous great examples on the Bob n Betty blog and Instagram page, made by the Design Teams over the years. It really is worth the time.

Layered Vintage Cards

combo 2

Card 1: Butterflies 

card 1.2

card 1 close up 1

card 1 close up 2

card 1 close up 4

card 1 close up 5

card 1 close up 6

card 1 close up 7

card 1 close up 8

card 1 close up 9

card 1 close up 10

card 1 close up 11

card 1 close up 12

Card 2: Birdie

card 2.1

card 2 close up 1

card 2 close up 2

card 2 close up 3

card 2 close up 4

card 2 close up 5

card 2 close up 6

card 2 close up 7

card 2 close up 8

card 2 close up 9

card 2 close up 11

card 2 close up 12

card 2 close up 13

card 2 close up 14

Process:

  1. Die cut tags, labels and lattices using Bob n Betty’s Meadows, Classics & Glam Craft Decoupage Specialty Papers & old book pages.

1

2. Distressed the edges of all the paper elements (die cuts and torn pieces) with Vintage Photo Distress Ink. Also fussy cut some flowers from these papers.

2

3. Distressed the edges of the paper mats with a distress tool to give a worn out look and also darkened the edges with distress ink, then adhered these to the white card base.

3

4. Created a visually pleasing composition/design by layering the elements (die cuts, fussy cut elements, gauze, twine, sisal, burlap, flowers wood slices, corrugated cardboard, alphabet beads & wooden buttons) and adhered some of the elements with liquid glue and others with 3d foam tape to add dimension

4

5. As a finishing touch, did background stamping with archival ink, created white ink splatter & added a few doodles.

Bob n Betty Supplies Used:

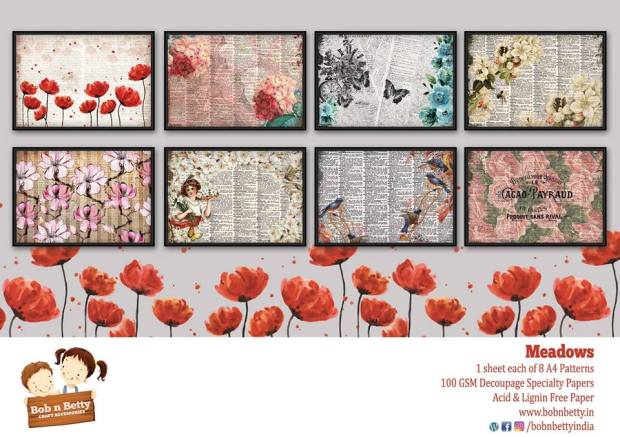
Meadows Decoupage Specialty Papers

29683445_2024528197797578_6673127427614717590_n

Classics Decoupage Specialty Papers

29594471_2024526521131079_7387660994226755361_n

Glam Craft Decoupage Specialty Papers

GC003

That is all for today.

Please do share your gorgeous creations using Bob n Betty papers with us on our facebook group Bob n Betty Buddies. 

Remember you can always purchase all the beautiful Bob n Betty products from our wonderful Sales Buddies. 

Thanks for your precious time 🙂
Stay Blessed!
Preeti Datta
preeti-dutt

“Sparkling Eyes” a mixed media layout by Riddhi Jani, featuring ‘Classics’ collection.

Hello everyone,

Riddhi here with a new DT project for Bob n Betty.

The mere sight of an Owl is enough to send shivers down the spine, but I do not find any reason to fear this beautiful bird. Just a look at those sparkling eyes melts my heart. So to endure my love for this gorgeous bird I have designed a mixed media layout, using a paper from the “Classics” collection of decoupage specialty papers range by Bob n Betty.

I simply took a Bob n Betty’s chipboard sheet, adhered my paper and started playing with the colors and textures and here is the outcome….

Do leave your valuable comments if you liked my work.

love
Riddhi

A Terracotta Vase upcycled by Jaanhvi Hinduja, using DecoPatch papers

Hello people!
Who doesn’t love some greens in their homes, arranged in beautiful vases and planters? We all do..! After all that’s the dose of freshness that we can create for ourselves amidst the concrete jungles that we live in..ain’t it?
I’ve upcycled a terracotta vase into a beautiful vintage shabby planter. I wanted to give the planter a very concrete stone look and make it appear rather old – yeah! Old is the new look that’s being loved around!
Let’s get started:
1. I began with washing the terra cotta pot nicely to remove the dust. Also, a washed/soaked terra cotta absorbs less paint.
2. I chose the motiff that I wanted to use and cut it in an oval shape. Then I cut a piece of chipboard in the same oval shape.
3. I wanted the decoupage motiff to have a little dimension. I used resin clay for this. Took the oval chipboard as the base and flattened the clay on it. Cut the excess edges. Next pasted the motiff on the clay. Then stuck the clay on the pot with wood glue. Resin clay dries very fast. You can see some wrinkles on the edges. I liked that and let them be. In case you don’t, stick the clay first, smoothen out the edges and then decoupage the motiff. You might have to cut out some edges from the clay in this case.
4. For the concrete effect, I’ve mixed stone effect texture paste with white gesso and applied on the pot randomly. After it dried, sanded the entire pot nicely.
5. Painted the entire pot with a darker shade of grey. Using dry brush technique kept adding several layers of paint each a shade lighter than the previous to achieve the look.
6. For the moss effect, mixed the stone effect paste with Spanish moss chalk paint and using hard bristle brush, dabbed unevenly on the top and bottom edges. Did the same process with brown paint at some places to give  a soiled look.
7. I’ve used two step crackle medium to give cracks on the decoupaged motiff. Rubbed antiquing wax to highlight the cracks and give it a vintage look. I like the wrinkles on the edges more after antiquing :).
8. Finished the vase by gluing jute twine around the motiff.
Check out the pictures for clear understanding. Hope you like it!
Would love to hear your reviews on the paper and the projects that I share. There’s more to come. Pick up your papers, till we meet next.
Love,
Jaanhvi

Key holder by Tanvi Shah, feat. DecoPatch papers

Hi,

This is Tanvi & I am back with another project featuring the new release – DECOPATCH PAPERS.

A18036

A18031
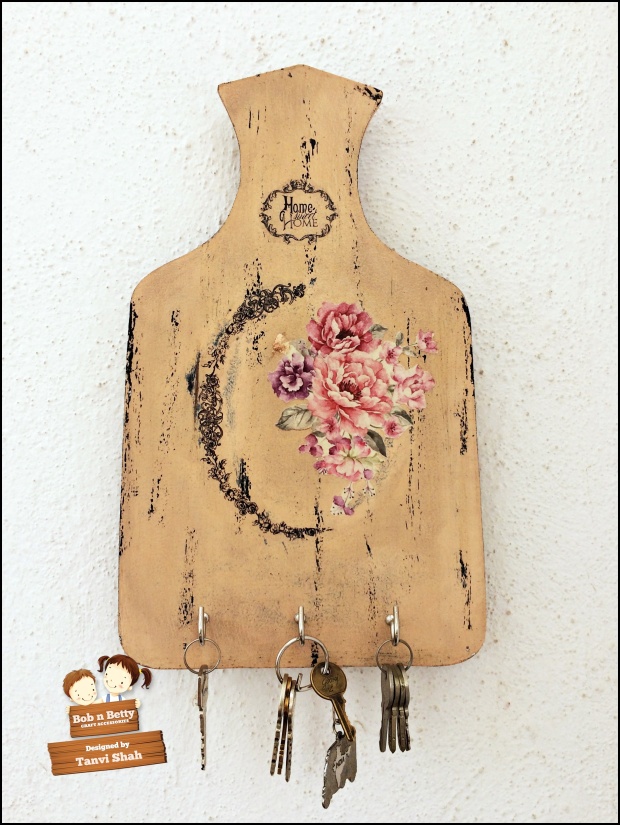
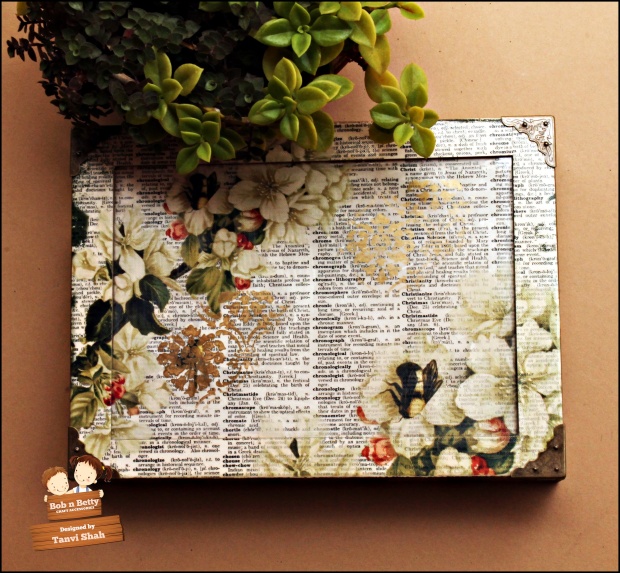
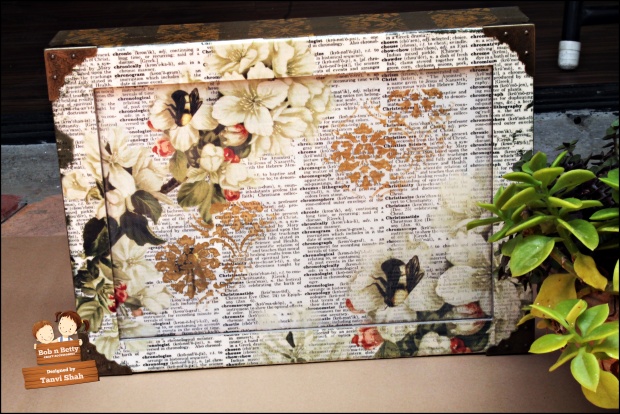
For this vintage key holder I first prepared a distressed base on which I transferred a laser print.

A18030

A18027

A18026
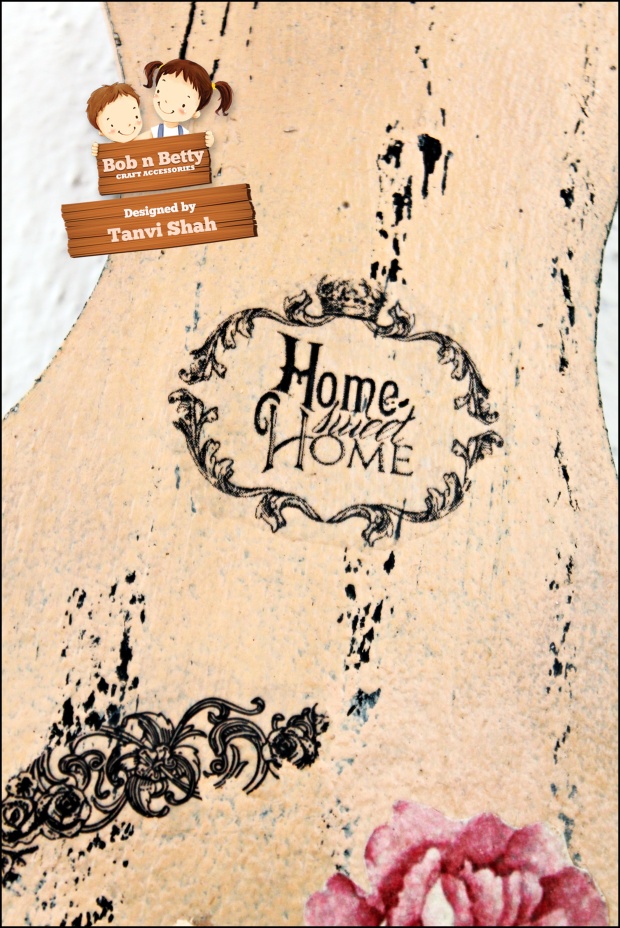
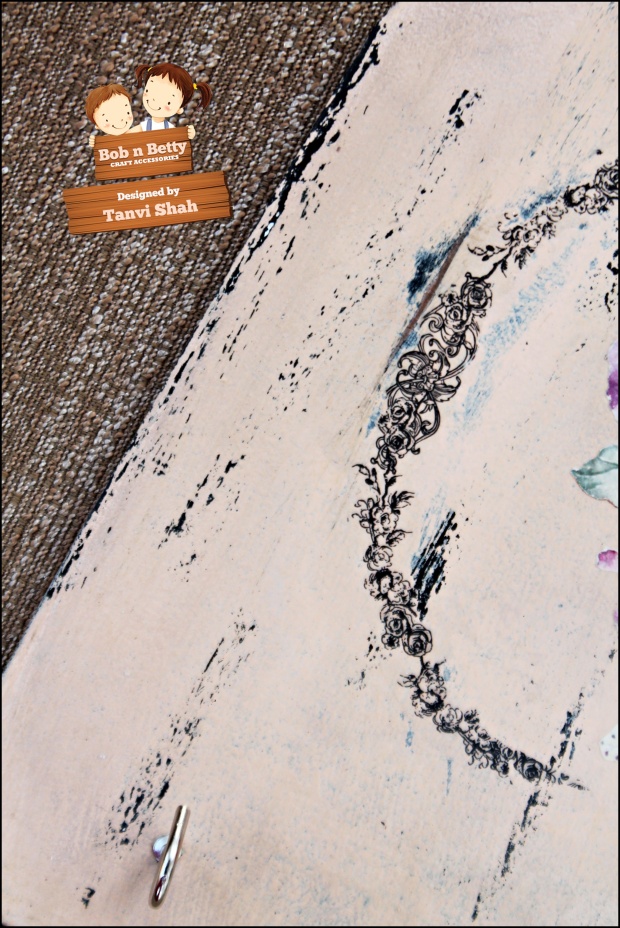
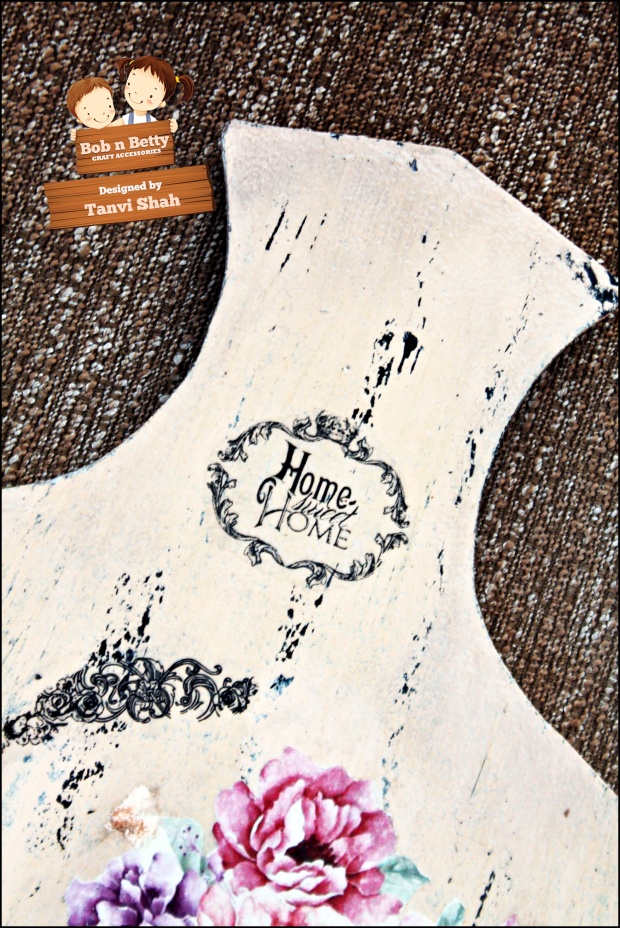
I fussy cut an image from the FLORAL ADORNMENTS sheet to decoupage on one side.  These 50 gsm papers blend into the project to  give a seamless look.

A18025 
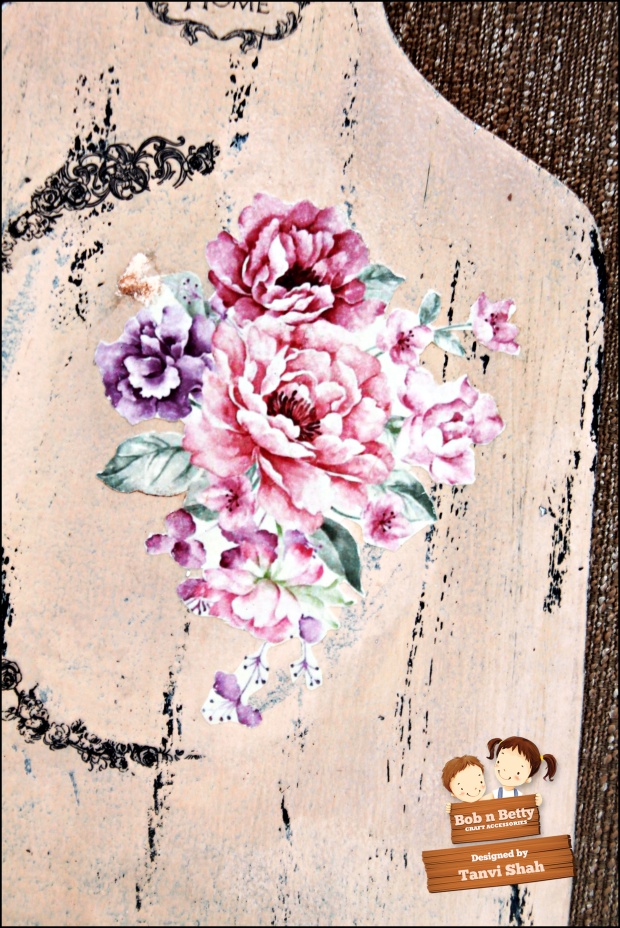
You can grab these papers from any of our Sales Buddies   &  share your gorgeous creations using Bob n Betty papers with us on our facebook group Bob n Betty Buddies. 

Thank you for visiting & happy crafting!

“Spring Beauty” a mixed media layout designed by Riddhi Jani, feat. Meadows paper collection

Hellooo lovely people,

I’m back with my new project for bob n Betty. This time I’ve made a project inspired by spring colors, featuring Bob n Betty’s Chipboard Sheets and a paper from Decoupage Specialty Paper collection “Meadows”.
I have made a video tutorial too to share with you all, here it is….
some close ups…
Thanks for stopping by.
Love
Riddhi

Magazine Holder designed by Tanvi Shah, featuring DecoPatch Papers

Hello Craft Lovers!

Bob n Betty has been the pioneer in introducing high quality papers 100 GSM papers specially meant for decoupage. These specialty papers became trend setters in the decoupage industry & no wonder they are so popular with decoupage artists in India & beyond.

Bob N Betty brings to you another brilliant well designed quality product – THE DECOPATCH PAPERS. These are high quality 50 GSM papers available in 10.5×29 inches, perfect for all kinds of surfaces including the curved ones.

Currently you can choose from 5 designs –

  • Rose Garden
  • Birds & Butterflies
  • Old World Charm
  • Floral Gilding
  • Floral Adornments

I have used the”Rose Garden” decopatch paper to decoupage a magazine holder. This design is totally mesmerizing, beautiful vintage colors & amazing layers and textures.

A18013

This magazine holder is rather large (14x11x8.5″) & I loved that these are long sheets – 10.5×29 inches, giving me a seamless finish on both the sides.

A18018

A18019

A18017

A18015

I wanted to retain the vintage look & yet add some bright happy colors. With chalk paints & beautiful 2 layered stenciling I managed to get the desired look.

A18016

A18014

A revolutionary product for decoupage lovers, go grab yours from our wonderful Sales Buddies   &  do share your gorgeous creations using Bob n Betty papers with us on our facebook group Bob n Betty Buddies. 

Bob n Betty will soon be celebrating it’s 3rd Birthday on 28th April, yay!! Everyone at the Bob n Betty family is very thankful for all the love & support bestowed on us. To celebrate, there is an awesome giveaway & a Mega Contest already under way, to check out all the details & for your chance to win superb prizes, please visit the Bob n Betty Facebook page.

Tanvi

Decoupaged Tote Bag designed by Jaanhvi Hinduja, Featuring DecoPatch Papers

Decopatch – Fabric Decoupage
Summers are here and so are the vacations! I see all the homes around bustling with activities – vacation planning, summer camps and of course the summer savouries and pickles :). Well! Bob n Betty sent me a packful of summer activities in the form of their newly launched ‘DecoPatch Papers’. Ummmm.. are you thinking how is it different from our decoupage speciality papers?
Well, most of us would know that decoupage originally began as a form of art involving altering products using patches/pieces of papers. So, the ‘DecoPatch Papers’ are the perfect resources for one to indulge into authentic art of decoupage. With beautiful motiffs, printed on fine quality fairly translucent 50 GSM papers, you could achieve high quality finish on your products. The extreme ease with which they fold make them usable on any kind of surface including the curved ones. And not to miss, I was extremely delighted to see the attractive packaging! As they say, what the eyes admire, the heart desire 😉 ;).  It comes as singles, packed in sturdy cardboard rolls, making them reach you fresh and crisp and of course, easy to store!
I am sharing the first project that I’ve done with these papers with all of you here.
Fabric tote bag
We all know by now how bad plastic is for our environment, don’t we? I’ve decided to bring about a little change I possibly could by adopting a low – waste lifestyle and reducing the use of plastic wherever I can. So, I altered my fabric tote to make it more intriguing for me to carry it out :).  Here are the steps –
1.  I washed my canvas bag to remove all starch from it and ironed it well.
2. Next, I inserted a piece of cardboard covered with cellophane inside the bag. This is to ensure, when I paint, the colours don’t seep through the fabric and spoil the back side of the bag.
3. Then, I adhered masking tape to create stripes, and painted the unmasked area with light grey fabric/acrylic colours. I diluted the paint with water and painted as I didn’t want the paint to appear heavy and stiff  on the fabric.
4. Next, I cut the motiff out of the decopatch sheet, and applied white acrylic paint on the reverse side lightly. As the paper is fairly translucent, I didn’t want the stripes on the background to show through the motiff.
5. Then, I stuck the motiff on the bag using diluted fabric glue. Then place cellophane and press gently from centre towards the edges to remove  all air bubbles. Then, I coated the patch with fabric glue.
6. I had come accross this beautiful stencil, which complements the motiff that I chose perfectly, and so with black fabric/acrylic paint I stenciled the image on the bag. Tip: use good quality stencil brush (foam daubers tend to make the paint bleed). Wipe excess paint on a tissue and use dry brush method and tap-tap brush technique for perfect stenciling.
7. Finally, I reversed the bag and ironed it. (Light iron setting).
8. Lastly, I decorated the bag with some coordinated fabric flowers and a blingy star!
I am pretty impressed, the bag looks no less than a printed factory – made one :)I am going to make quite a few of these and gift my friends and relatives – “we’ve banned the plastic bag, for a better tomorrow“. 🙂
Hope you like the project!
Try out the papers and spam me with all your queries:) Happy to help😘.
Jaanhvi

Mixed Media Canvas Designed by Preeti Datta Featuring Classics Decoupage Specialty Papers

Hi friends 🙂

Preeti Datta (aka Dutt Preety) here. How are you today?

Bob n Betty will soon be celebrating it’s 3rd Birthday on 28th April, yay!! Everyone at the Bob n Betty family is very thankful for all the love & support bestowed on us. To celebrate, there is an awesome giveaway & a Mega Contest already under way, to check out all the details & for your chance to win superb prizes, please visit the Bob n Betty Facebook page.

Today, I’d like to share a Nature Inspired Mixed Media Canvas. I’ve used papers from the new and gorgeous “Classics” Decoupage Specialty Papers Collection. They are so versatile and the prints are full of vintage goodness. A must have in your stash! The stunning owl image which is the focal point of my canvas and the titles are from the Classics Collection. The prints in this collection make for brilliant focal images as well as classy backgrounds.

Nature Inspired Mixed Media Canvas

1

close up 15

close up 1

close up 2

close up 3

close up 4

close up 5

close up 6

close up 7

close up 8

close up 9

close up 10

close up 11

close up 17

close up 18

4

5

11

Process:

Took an 8 by 10 Canvas Board & applied a thick layer of heavy white gesso on it. To create texture in the background, created grooves in the wet gesso with the end of a paint brush & added few mini beads. Once, it was dry, sprayed on colors. For the focal image & titles, fussy cut elements from one of the papers in the Classics Collection, created a nest with sisal, dry hay, colored gauze, feathers and then adhered the owl & titles to it. Also, added flowers, die cuts, wood slices & lace around the nest to form a visually pleasing composition. Then did background stamping with black archival ink and for shine, applied Prima’s Metallique waxes to the background. For additional texture & shine, applied Finnabair’s art stones & glass glitter using 3d Matte Gel to some of the areas.  Then, dry brushed some white gesso onto the flowers and created white ink splatter. In the end, distressed the edges of the canvas with black soot distress ink.

Used Bob n Betty’s Classics Decoupage Specialty Papers:

29594471_2024526521131079_7387660994226755361_n

That is all for today.

Please do share your gorgeous creations using Bob n Betty papers with us on our facebook group Bob n Betty Buddies. 

Remember you can always purchase all the beautiful Bob n Betty products from our wonderful Sales Buddies. 

Thanks for your precious time
Stay Blessed!
Preeti D
preeti-dutt

A Scrapbook Page LO designed by Tanya Cloete, featuring You n I paper collection

Hello Bob n Betty Buddies,

Tanya here, sharing a Page Layout with the STUNNING You and I Collection! The colours on this layout are truly magical and fit so well together!

Here are the Instructions you may use to recreate such a project:  

  1. Use white cardstock as the base for your layout.
  2. Tear 2 pieces from one of the sheets in the collection as per the picture and adhere.
  3. Fussy cut some flowers, leaves and wording elements from the die cut sheet in the collection.
  4. Ink the sides of the cardstock using the Tim Holtz Speckles stencil and some distress inks and oxides.
  5. Add some white crackle texture paste using a circle stencil and apply over the inked stencil marks. Leave to dry.
  6. Randomly stamp some butterfly images.
  7. Add some random paint splatters on the page using black impasto paint.
  8. Paint 2 of the filigree chipboard frames with Finn’s Sparks Paint Iris Potion and Metallique Paint Golden Moss.
  9. Emboss the chipboard frame (photo) with white and chippie title with black embossing powder.
  10. Cut 3 butterflies from the collection sheet using the Tonic Studios Wings and Things Die.
  11. Cut a few leaves from green and white cardstock using the Creative Expression Die Swirly Leaf Trio.
  12. Arrange the rest of the embellishments (flowers, leaves, gauze, buttons, sequins) as per the picture or as you like.
  13. All done!

Here are the close ups of this layout…

Hope you like this as much as I enjoyed making it!

Happy Papercrafting!
Tanya Cloete

Decoupage box using the “Meadows” collection by Tanvi

Hello, this is Tanvi here to feature another awesome release MEADOWS, a set of eight delicate floral designs with a vintage touch in our range of decoupage specialty papers. This is a perfect collection for someone like me who loves vintage but always looks out for a dash of happy colors in vintage too! Each design is gorgeous!

bnb1.jpg

I will be sharing a decoupage box using my favorite print from the collection in which I have combined decoupage with reverse decoupage for the glass lid of this box.

A18005

Let me explain briefly –

  1.  First I did some stenciling with gold acrylic paint on the backside of the glass lid.
  2. Next I trimmed the specialty decoupage paper to the size of the lid & cut off a rectangle the size of the glass piece from this.

box

3. Glue this piece on the backside of the glass right side facing down  (reverse decoupage) & the left over to the frame of the lid. Seal with decoupage glue.

4. The base of the box was painted in antique gold acrylic paint. Once dry used masking tape to create bands & stenciled over the open bands with gold paint. Loved the stenciled bands.

5. Varnished & sanded the box to finish.

Here are some close ups of the box –

A18007

A18006

A18008

A18012

A18009

Hope you like this “twist” of combining both decoupage techniques in one project.

We are also having a MEGA CONTEST for our third anniversary. Do check our FB page for details.

Thats all for today!

Thank you for stopping by & happy crafting!

Hugs,

TANVI