Hi Friends!
Preeti Datta (aka Dutt Preety) here, hope you are having a pleasant week 🙂
This is my first post on the Bob n Betty blog as their Design Team Member. I’d like to share a couple of Mixed Media Cards with you today. I’ve done a picture tutorial for both these cards, which are fairly simple.
You would be happy to know that Bob n Betty has introduced a new product to their range of supplies and that is Faux Leather. The idea behind these cards was to show how using even small bits and snippets of Bob n Betty’s Faux Leather, one can easily embellish projects. This faux leather has a beautiful texture on its surface and rubbing a bit of colored waxes brings out the lovely texture. It can be easily die cut using any of our thin cut dies. It is a very versatile product with which one can do a lot including creating album/journal covers, making one’s own embellishments, tassels, background texture for mixed media etc. Hence, it is a must-have in one’s craft stash as something that will add a bit of novelty and class to one’s projects.
Let’s get started.
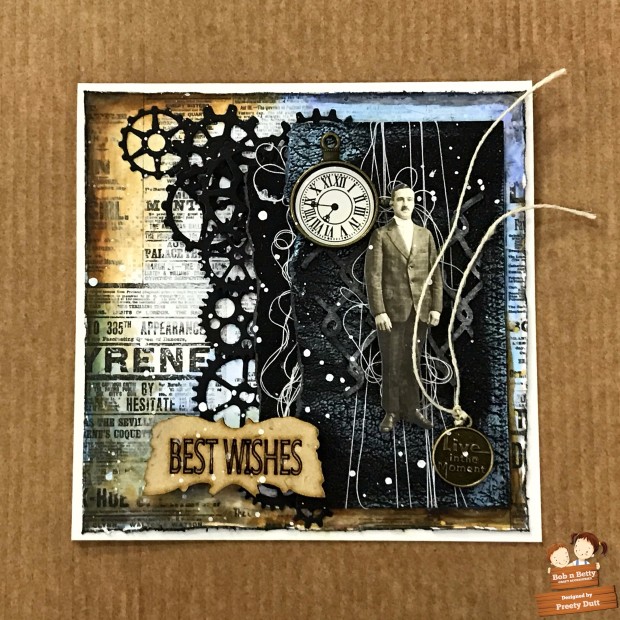
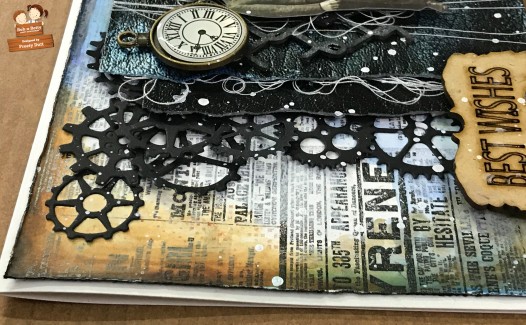
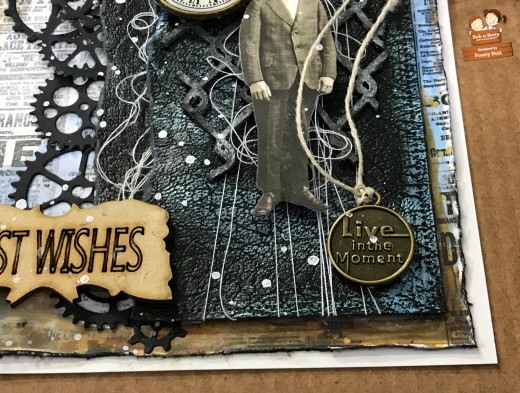
Mixed Media Card 1: (Masculine)
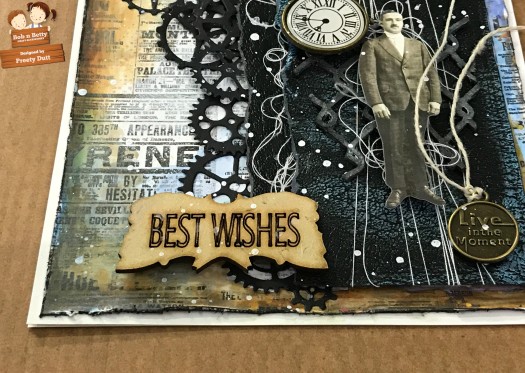
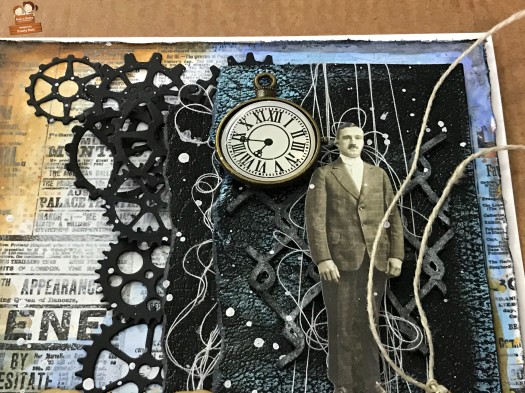
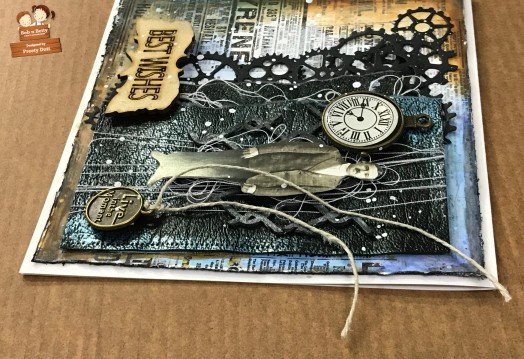
Here are a few close-up photos:
Process-
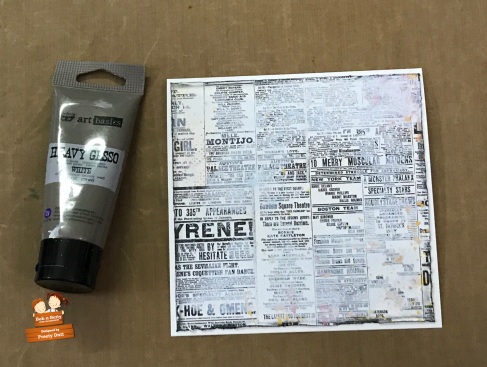
1. The main card panel is a text design paper from the Bob n Betty “Optima” Paper Pack, this was cut to a little less than the 6 by 6 white card base, distressed on the edges for a worn out look and then inked with black soot distress ink.
2. White gesso was applied to some parts of the text paper to push the text into the background.

3. Then color was added with zig markers and an aqua brush.

4. A couple of panels of faux leather were die cut using a stitched rectangle die and then torn from one side to give a distressed look. To bring out the gorgeous texture in the faux leather, a little inka gold was lightly rubbed on the surface of the leather.
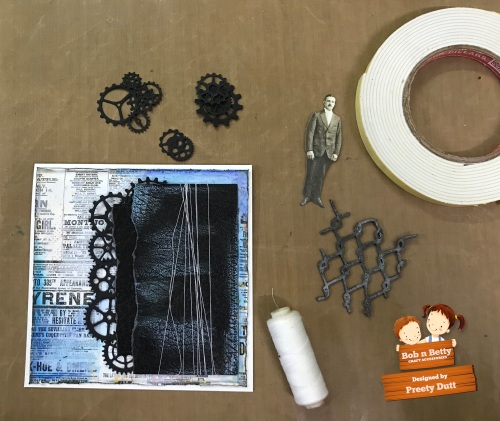
5. Some gears and cogs were die cut in black, the faux leather panels were adhered to the card using foam tape. Some thread was added in between for more texture and interest.
6. All the coordinating elements including a vintage photo, die cuts, wire chipboard, charms and twine were added to the card in such a way, so as to create a balance to the design. The idea was to create dimension and layers in a way that looked pleasing to the eye.
7. In the end, some white splatter was created with watered down white gesso.
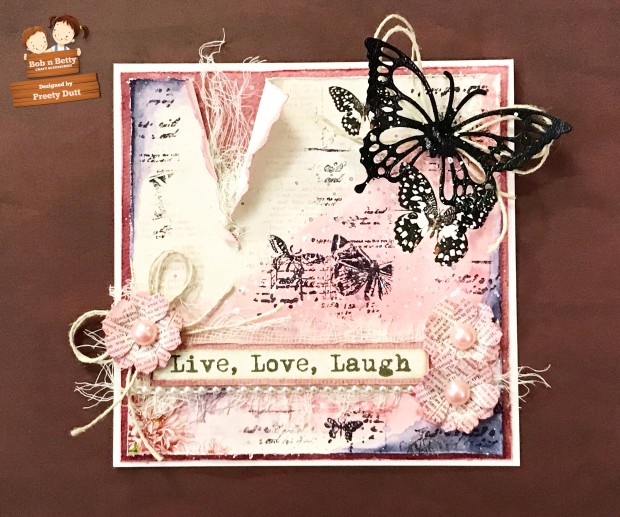
Mixed Media Card 2: (Feminine)
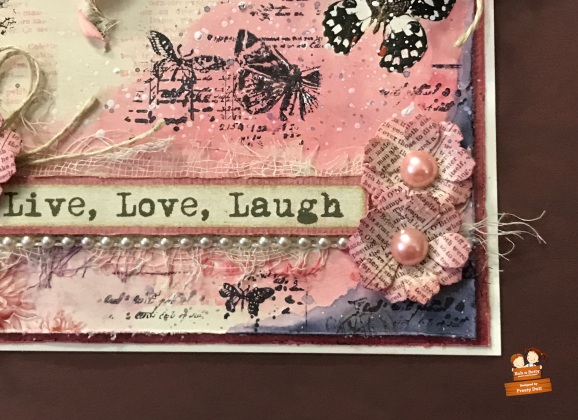
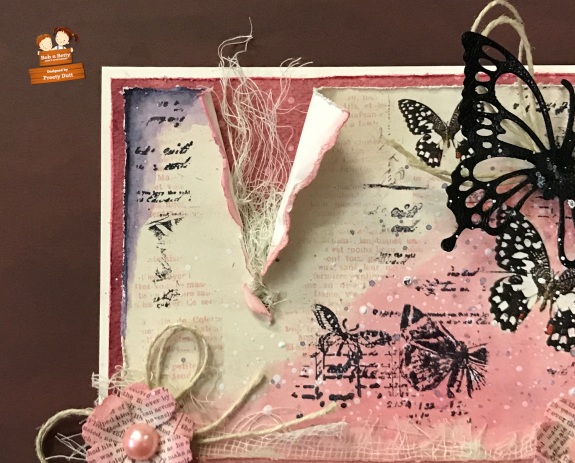
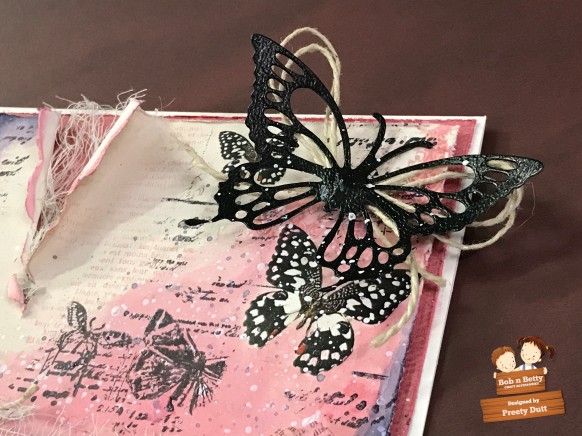
Here are a few close-up photos of the card:

Process-
1. 2 coordinating papers from Bob N Betty Paper Packs were chosen. The main panel is from the “Feel Like a Butterfly” paper pack and the mat is from the “No One But You” paper pack. Both these were cut and distressed at the edges and then darkened with Worn Lipstick Distress Oxide Ink. The panel was adhered to the mat with foam tape for added dimension.
2. Flowers were die cut using the Cheery Lynn Designs- Tea Rose Medium Die and a text paper from the “No One But You” paper pack. The petals were lightly colored with distress oxide ink, curled slightly and stuck together. A pearl was added to the center.
3. Gina Marie Designs Butterfly XL die was used to die cut the faux leather butterfly.
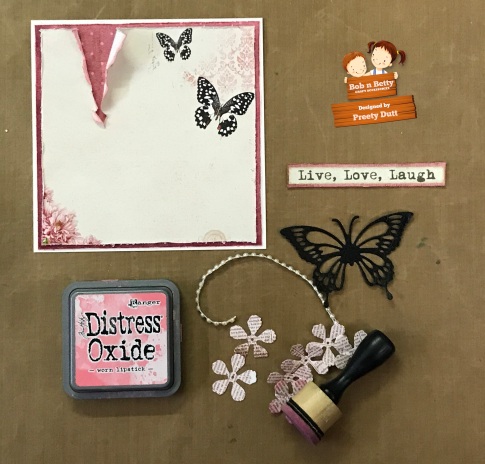
4. The title was fussy cut from the “No One But You” Paper Pack, distressed and inked on the edges.

5. Stamping was done in the background using a text stamp and distress oxide.
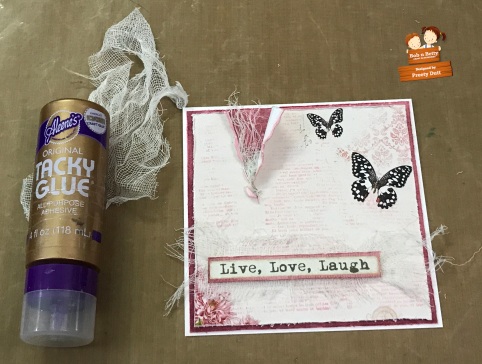
6. Some torn up gauze was adhered to the card base for texture and interest. The title was then adhered on top of the gauze using foam tape. A pearl lace was attached under the title in keeping with the feminine theme.
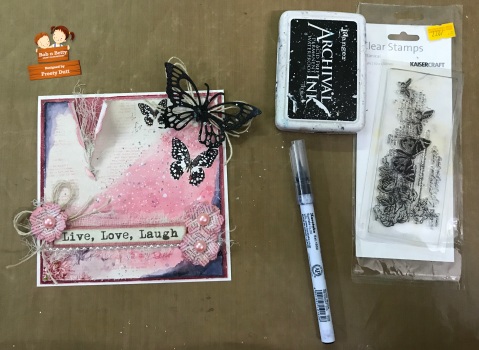
7. To add more color, water coloring was done with a black zig marker and pink distress oxide. Then stamping was done in the background using archival Ink.
8. Twine was added under the butterfly and flowers. To bring the whole design together, black and white splatter was created with inks.
That is all for today.
Please do share your gorgeous creations using Bob n Betty papers with us on our facebook group Bob n Betty Buddies.
Remember you can always purchase all the Bob n Betty products from our wonderful Sale Buddies.
Thanks for your precious time 🙂
Stay Blessed!

Beautiful..
LikeLike
Thanks a lot 🙂
LikeLike
Awesome cards !
LikeLiked by 1 person
Thanks so much dear 🙂
LikeLike
Preety , both the cards are gorgeous, love the step by step !! you did wonders showcasing the faux leather !!
LikeLiked by 1 person
Thanks a ton mam 🙂 im so happy you liked it 🙂
LikeLike
Wow superb preeti ,well explained tutorial I like the both of them
LikeLiked by 1 person
Thanks a ton dear 🙂 im so happy you liked them.
LikeLike
Thanks so much Preeti .. this was so beautiful explained in simple step by step method. Loved both the cards .. absolutely gorgeous!!!. Thanks
LikeLiked by 1 person
Thanks a ton Vaishali 🙂 I’m so happy you liked it.
LikeLike